


Share AWS access with HAZERCLOUD
For an architecture review or cost audit we need to look at your AWS account, not change anything. The safest way is a dedicated IAM user with read-only permissions, which you can delete the moment we are done. The four steps below take about five minutes.
What this gives us
A user with two AWS managed policies: ReadOnlyAccess, which lets us view resources and configuration across services, and AWSBillingReadOnlyAccess, which lets us view Cost Explorer, invoices and usage. Neither policy allows creating, changing or deleting anything. We never ask for root credentials, access keys with write permissions, or your own login.
Step 1: Create the IAM user
- Open the IAM console in your AWS account.
- Select Users in the left menu.
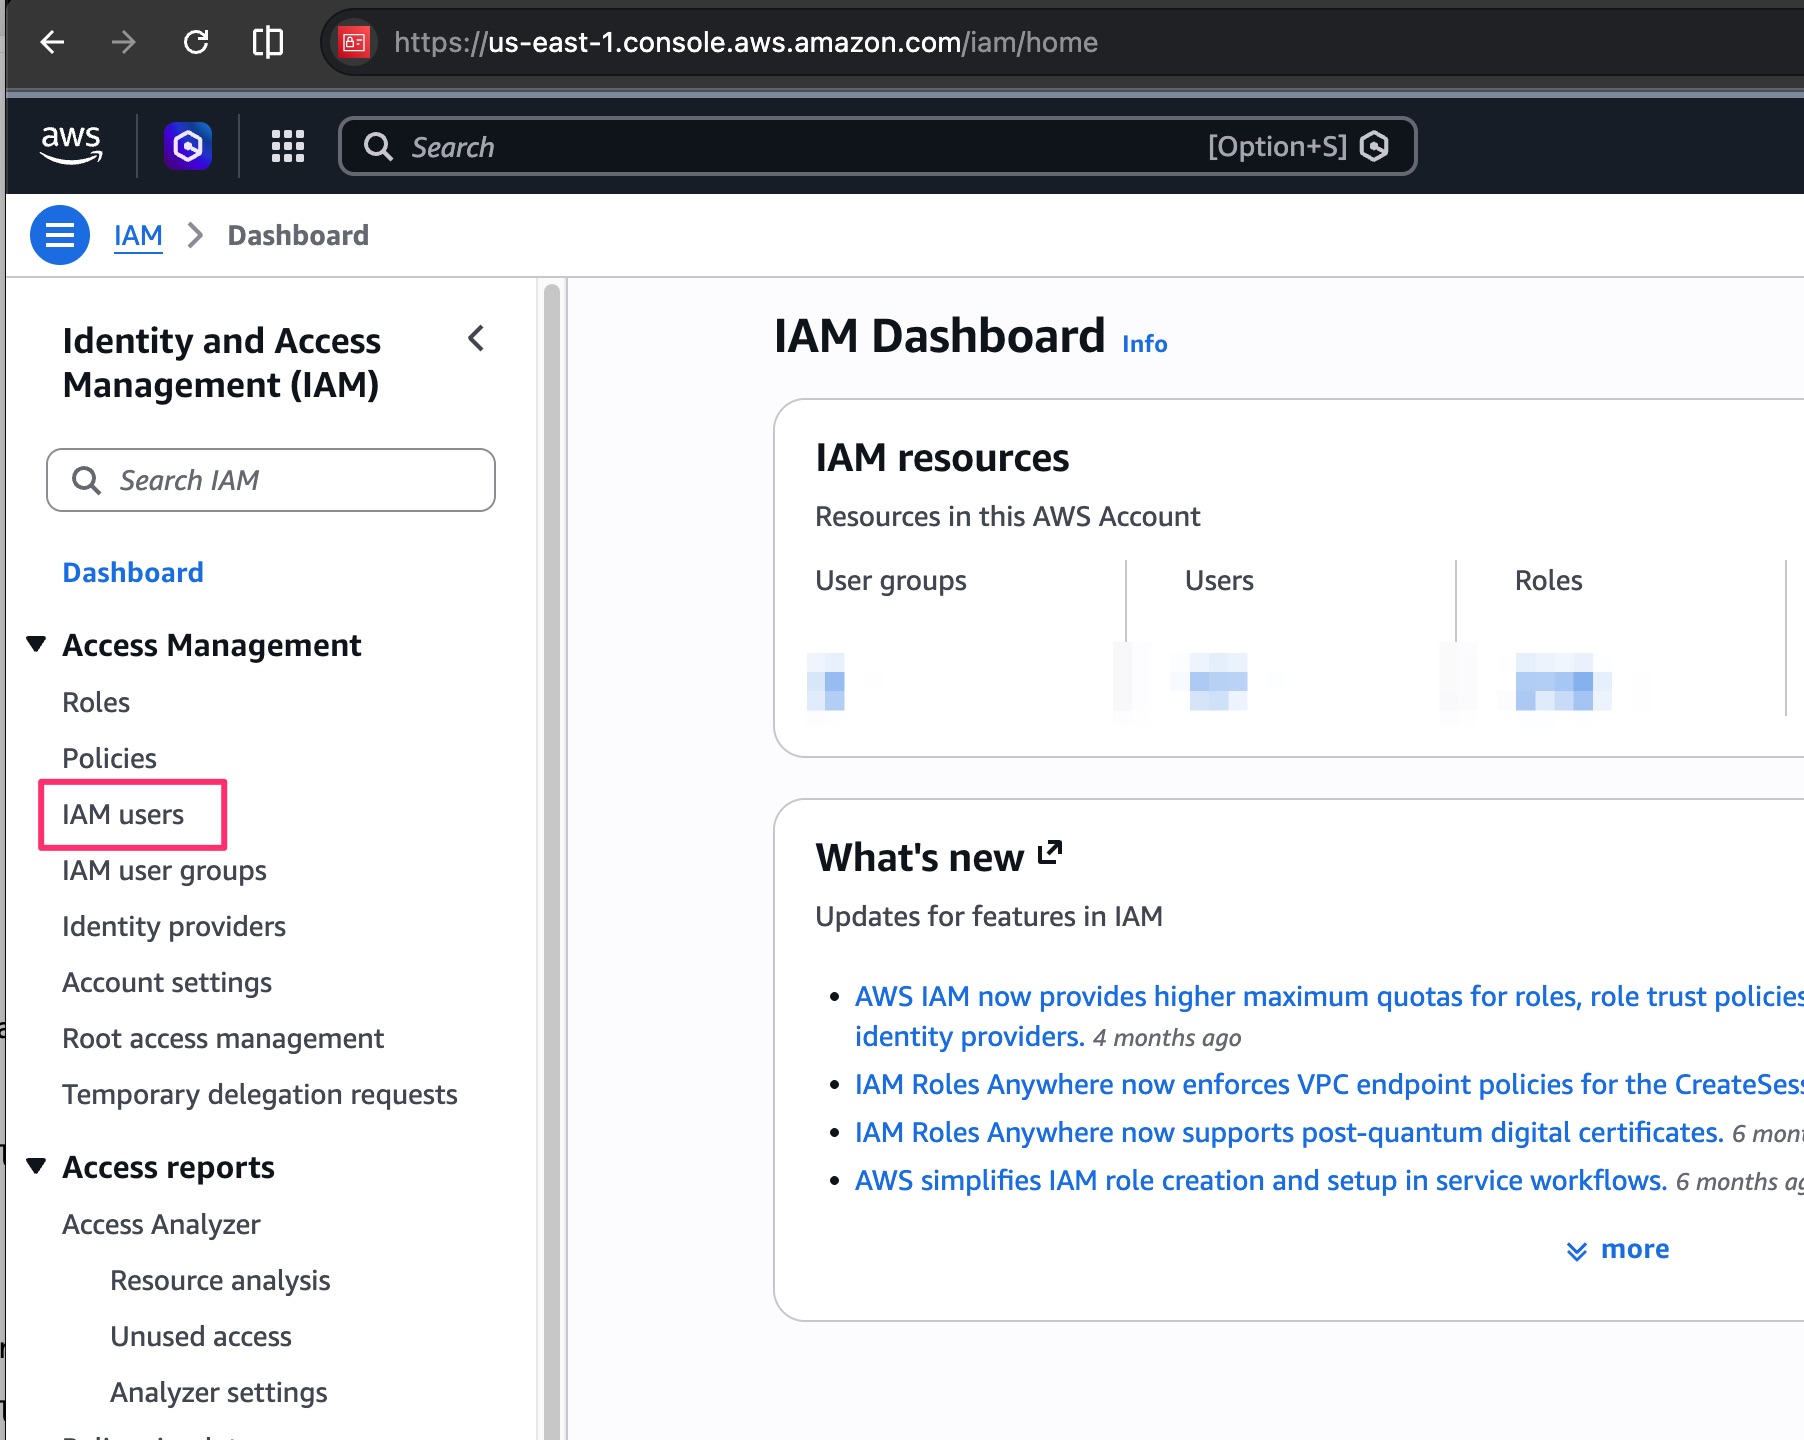
- Click Create user.
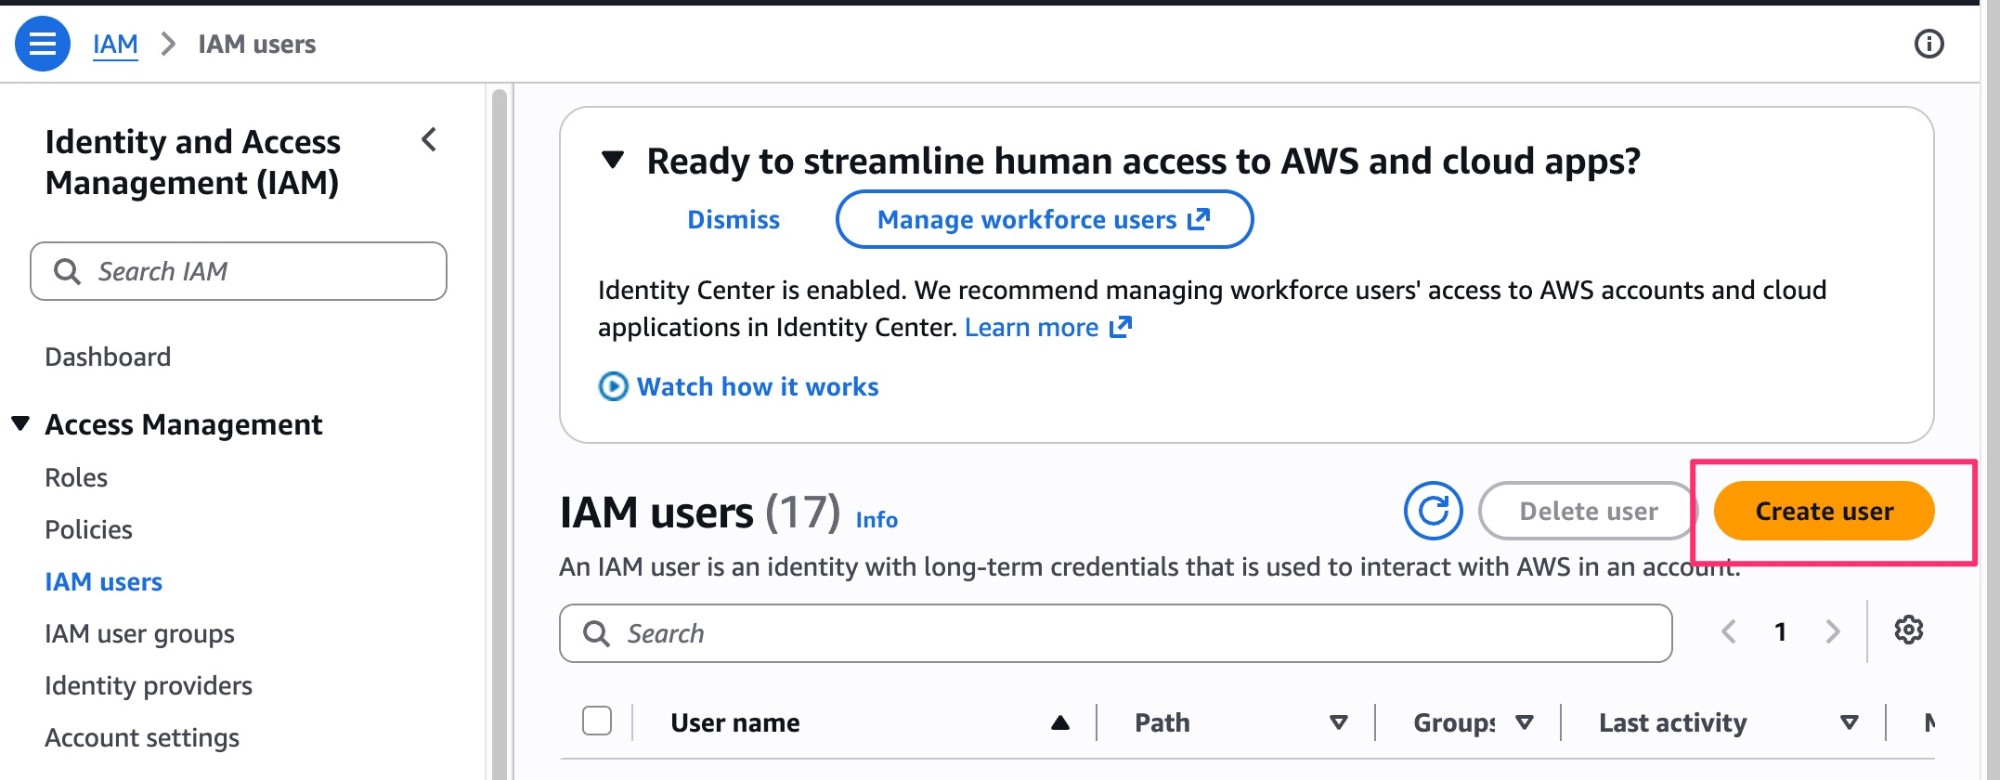
- Enter a username, for example hazercloud-review.
- Tick Provide user access to the AWS Management Console.
- Select I want to create an IAM user when AWS asks how the user will access the console.
- Choose an autogenerated password and leave "Users must create a new password at next sign-in" ticked.
- Click Next.
Step 2: Attach the two read-only policies
- Select Attach policies directly.
- Search for and tick these two AWS managed policies:
ReadOnlyAccessAWSBillingReadOnlyAccess
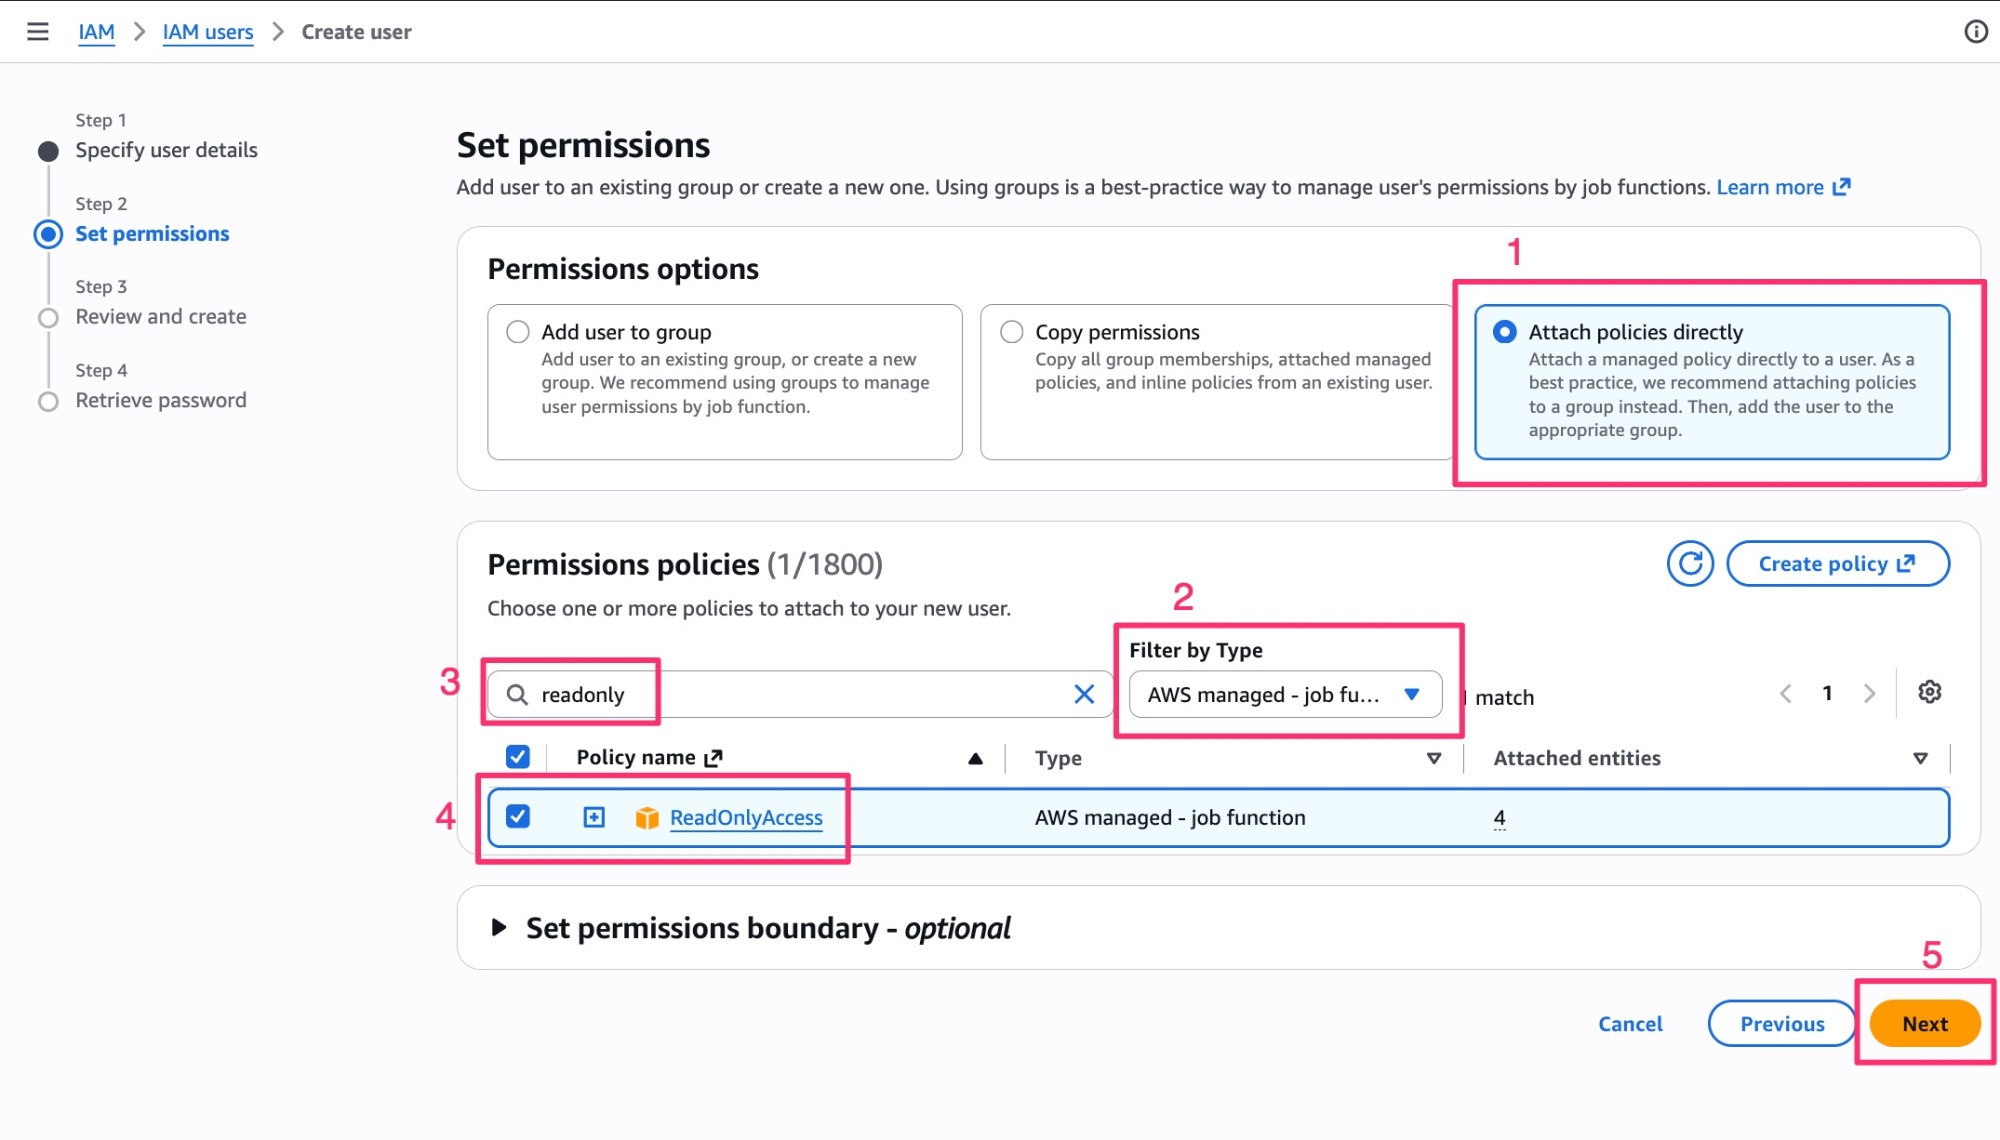
ReadOnlyAccess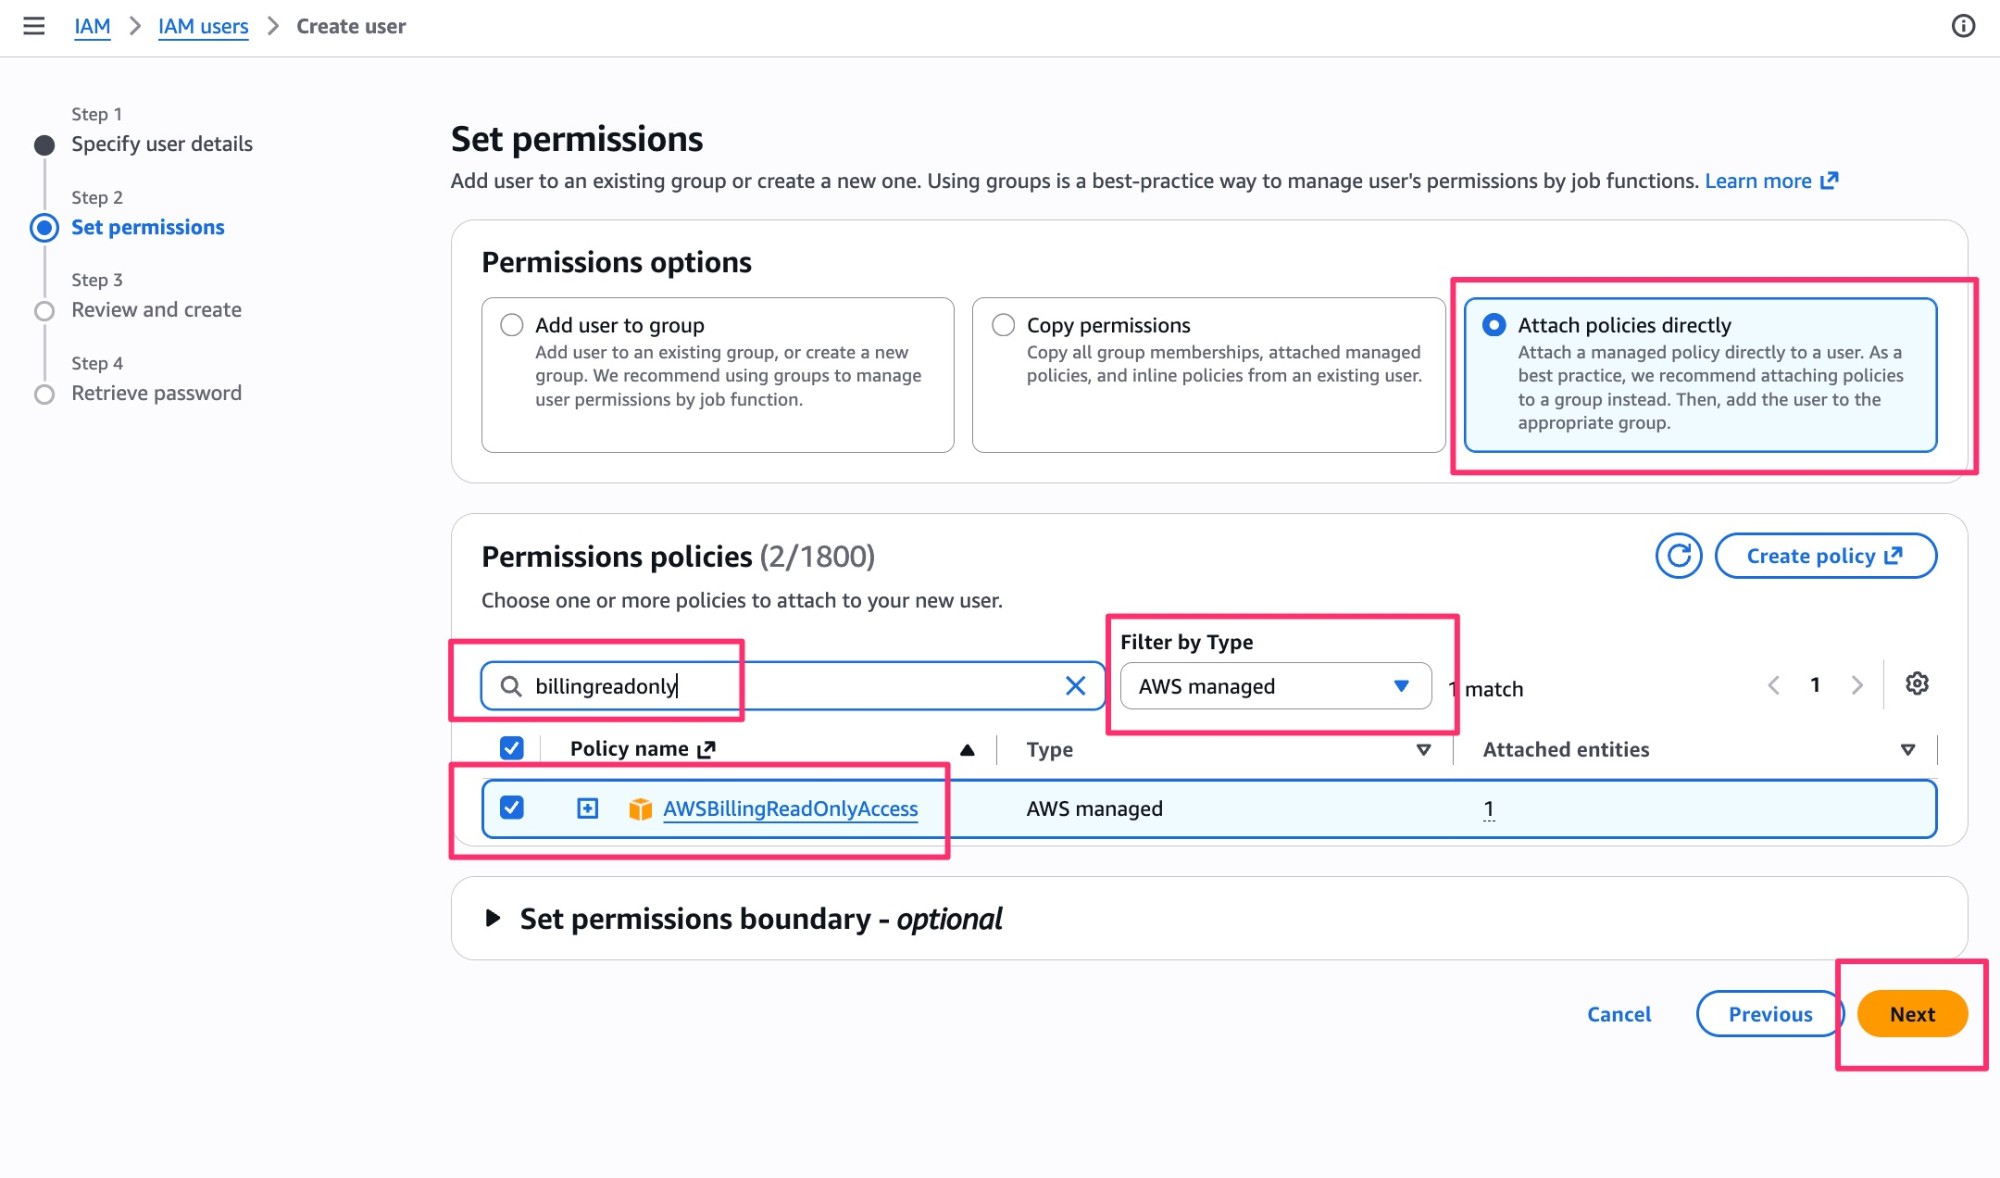
AWSBillingReadOnlyAccess- Click Next.
Step 3: Review and create
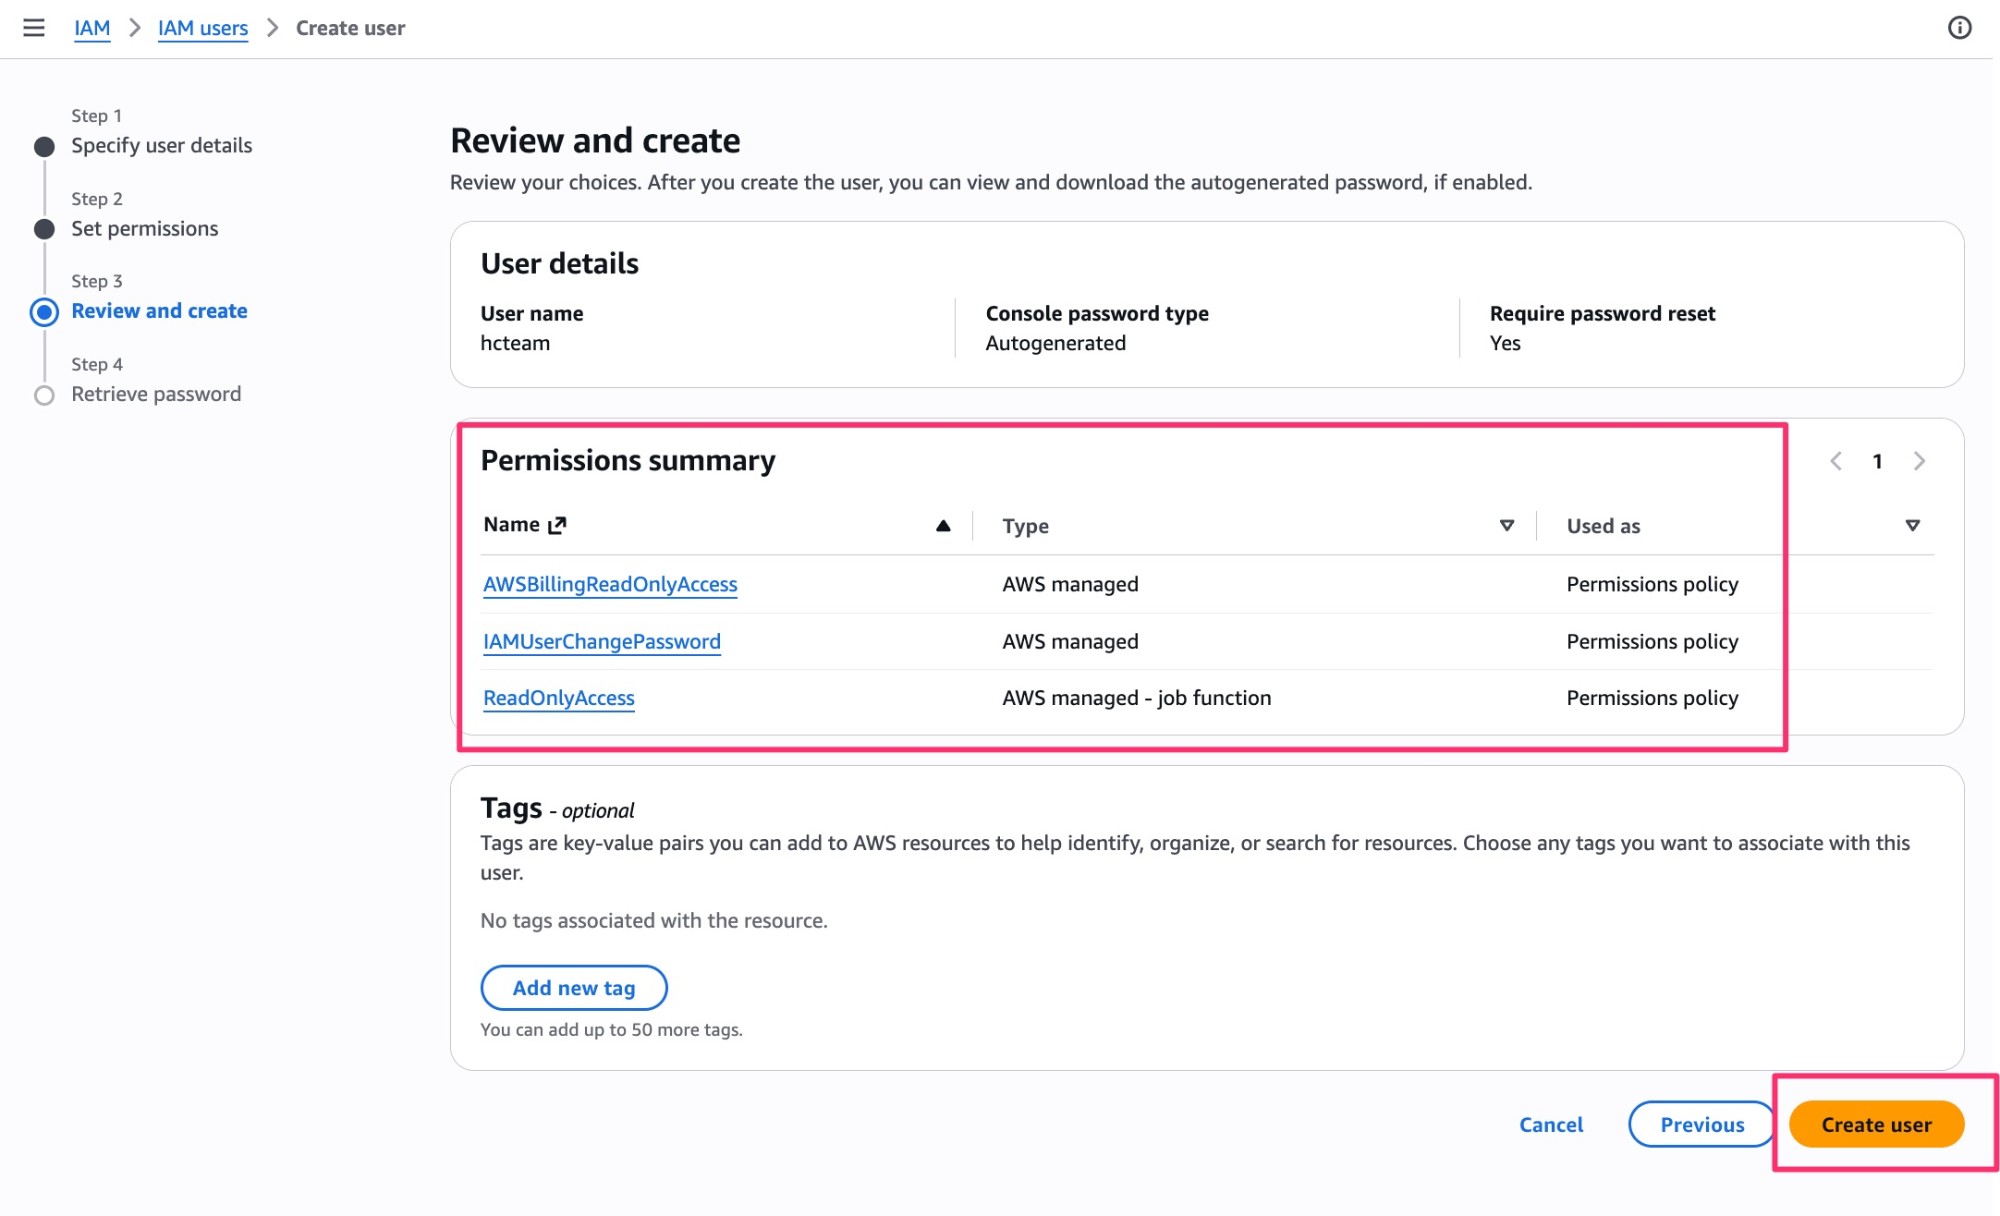
- Check the username and the two attached policies.
- Click Create user.
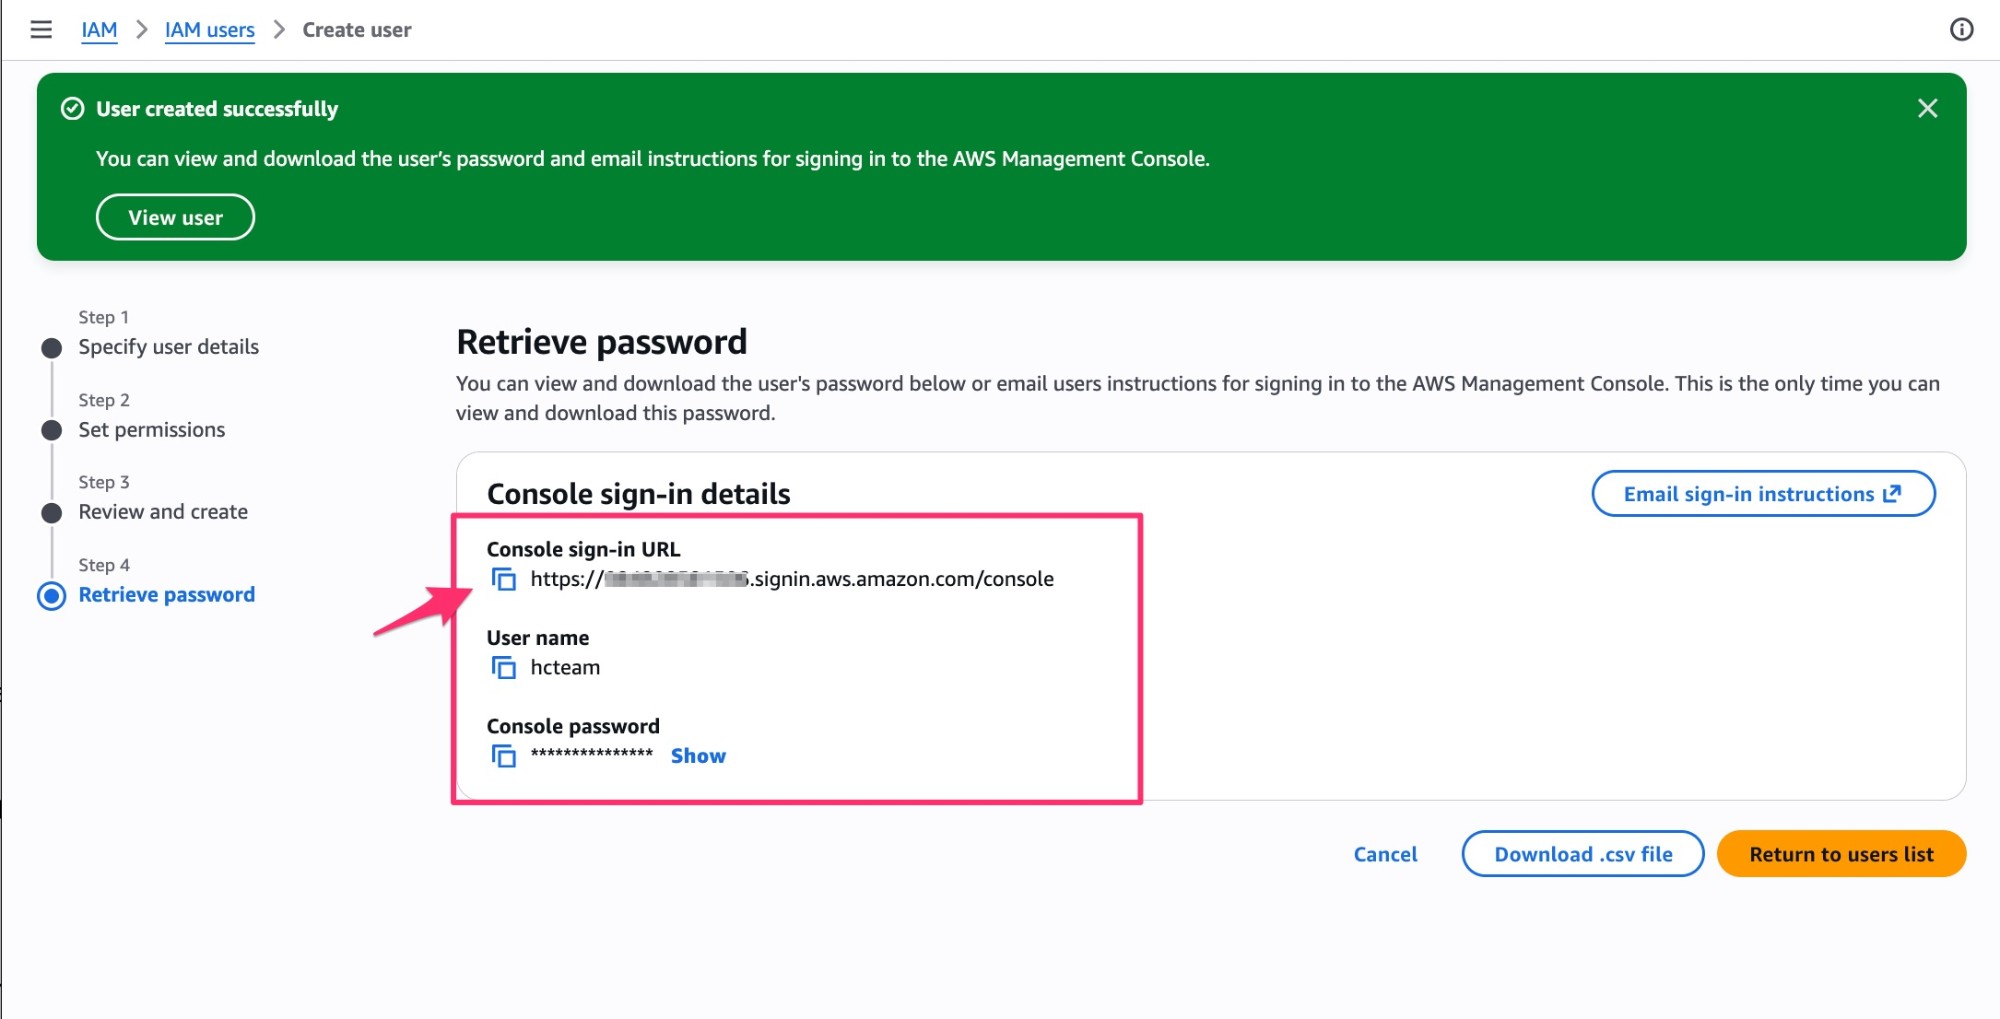
- On the confirmation screen, download or copy the console sign-in URL, the username and the password. You will need all three in the next step.
Step 4: Send the login to your HAZERCLOUD contact, safely
Send these three items:
- Console sign-in URL (it contains your account ID or alias)
- Username
- Password
If you are unsure, send only the console URL and username by email and ask your contact how to pass the password.
Step 5 (optional, root account only): Activate IAM access to Billing
AWS blocks IAM users from the Billing console until the account owner switches it on once. If your HAZERCLOUD contact tells you the Billing pages show access denied, or you are not sure whether this was ever done in your account, sign in as the root user and do the following. It is safe to repeat.
- Sign in to the AWS console as the root user.
- Open the Billing and Cost Management console and select Account in the left menu.
- Scroll to "IAM user and role access to Billing information" and click Edit.
- Tick Activate IAM Access and click Update.
- Sign out of the root user. You do not need it again for this guide.
Reference: AWS documentation on activating IAM access to billing
What happens next
We sign in, run our read-only review, and share the findings with you. We do not create, modify or delete anything with this user, and we do not create access keys for it. When the review is finished, delete the user in IAM (Users, select the user, Delete) or tell us and we will remind you. If you prefer, add an IAM permissions boundary or a condition limiting sign-in to a date range; both work with this setup.
Questions? Reply to the email from your HAZERCLOUD contact, or write to us via the contact page.